People often tell me they simply don’t have time to get to the gym to exercise. This is something I truly don’t understand. Exercise is the very thing that makes you able to enjoy life, to perform optimally at work, and to fight off illness. How can you not make time? But in the interest of making things work for all people, I thought I’d share some great exercise tips for people who can’t seem to drag their asses away from their desk. These are also useful as add-ons to your existing regimen. If you have extra energy and are feeling stagnant at your desk, just “drop and give me twenty” as they say!
PLANK HOLD
I’m starting with a basic plank hold. This one is an excellent all around full body exertion if done properly. I know people who enter thirty-day plank hold challenges, starting with 20 seconds a day and increasing up to as long as five minutes! I wouldn’t worry about how long you hold a plank, though. Twenty seconds to start (and for some of you ten seconds may be a stretch) is just great, but work within your ability and don’t over exert yourself from the very start. We want to be INJURY FREE!
This full-body exertion works the shoulders, abs, biceps, gluteal muscles, quads and calves if done properly.
When you hold a plank (variations are pictured below), be sure to squeeze in the abs, hold your arms strong and solid, squeeze the butt cheeks together and press the heels back so the feet are flexed.
BASIC BEGINNER PLANK STANCE:
Some things to note about Plank Holds:
1) Choose a posture – either fully extended out to the feet or on the knees (easier version); Either up on the hands or down on the forearms (easier version).
2) If you are on knees, your legs are together. If your legs are extended out they are together (traditional plank), or they are about hip or shoulder distance apart (easier version).
3) Keep your body from the neck to either the knees or the toes (whichever is on the ground) in a SOLID PLANK (picture the plank of a ship – as in “Walking the plank,” and that’s how straight you want your body to be from the neck down).
4) Do NOT sag your pelvis down toward the floor (engage the abs to hold that pelvis firmly in place).
5) Do NOT lift the tush up too high in an effort to correct a sagging pelvis.
6) Tighten up in the abs from the bottom of the ribs all the way down into the pelvic region.
7) Squeeze the butt cheeks together, squeeze the quads and hold the arms strong and solid.
8) Hold for ten to twenty-second increments to begin with, and do three to five sets.
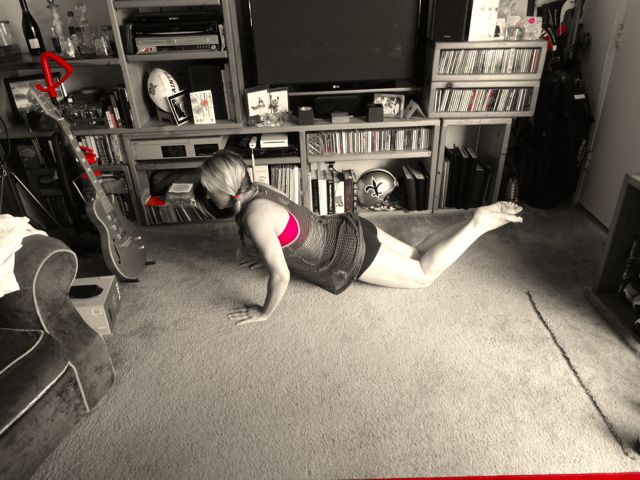
9) CHALLENGE 1: Once you’ve got this down, try lifting one leg off the ground a couple of inches and lengthen through that leg. Alternate legs half way through your hold!
10) CHALLENGE 2: Once you can easily hold plank up on the hands in a fully extended hold (on the feet, not the knees) for a good amount of time, try crossing one leg over the other for alternating holds. This will provide a little engagement on either side of the abs (the obliques).
This full-body exertion [Plank] works the shoulders, abs, biceps, triceps, lateral muscles, gluteal muscles, quads and calves if done properly.
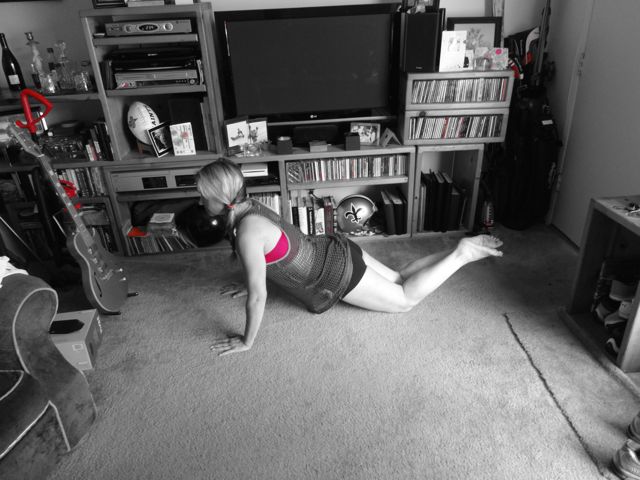
REGULAR PLANK STANCE:
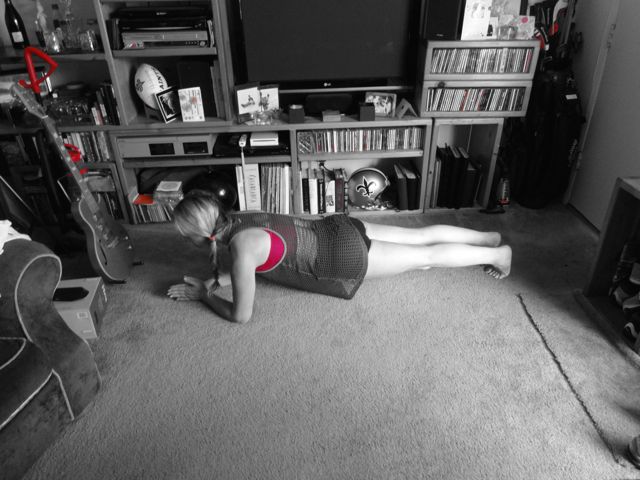
Regular plank stance can be done to begin with on your forearms as pictured above. The feet are extended out and flexed and the legs are together (separated for more ease), or you can be on the knees as well (legs together).
Anytime you want to make a fully extended plank hold a little easier to manage, you can separate your feet to about hip distance apart.
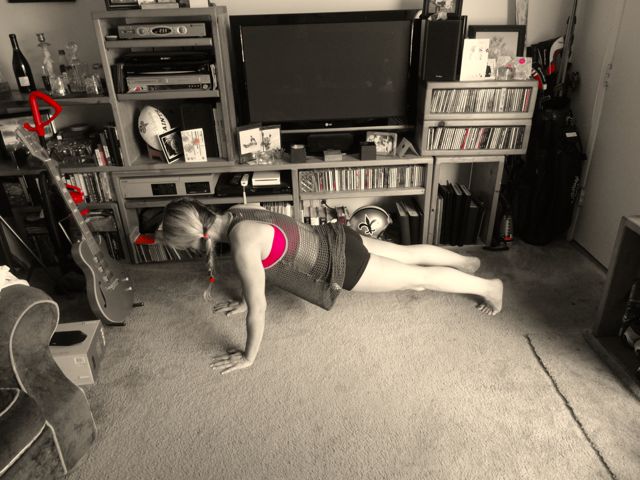
Above is a plank hold up on the arms, with the feet slightly apart to make the hold a bit more manageable for beginners.
WHAT A BODY PLANK LOOKS LIKE FROM THE SIDE (WHEN LOWERED):
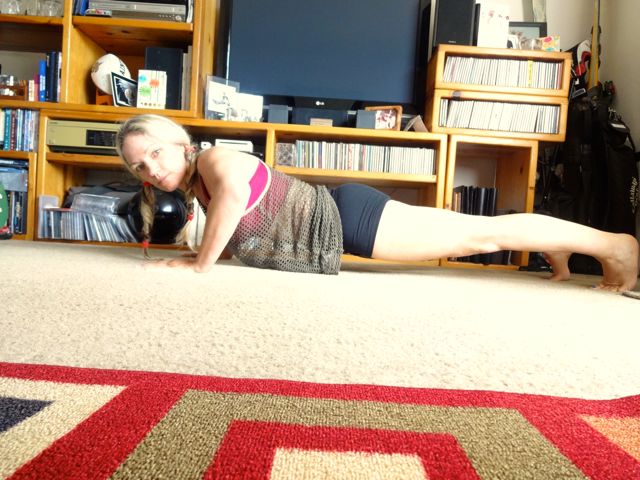
The the above picture is taken while doing a push up, a plank is the body position we take when doing pushups. Whether you are on your knees or your feet are fully extended, your plank stance from your neck to either your feet or your knees (whichever is touching the ground) should be flat as a board (or a plank). Do not allow the pelvis to sag down. Do not allow the tush to lift up too high, either. Continue to engage the abs to hold the tush and pelvis in place.
PUSH UPS
Push ups are the next step after a plank hold and will further engage the shoulder muscles (deltoids), triceps, biceps, lateral and chest muscles. Pictured below is a series of pushups, both on the knees (for an easier push up) and fully extended onto the feet (more advanced).
Start out doing 3-5 push ups if you are a beginner to exercise (otherwise go at your own pace). As your strength increases daily, either add more sets (up to 5 sets of push ups), or increase the number of pushups you do per set (or both!).
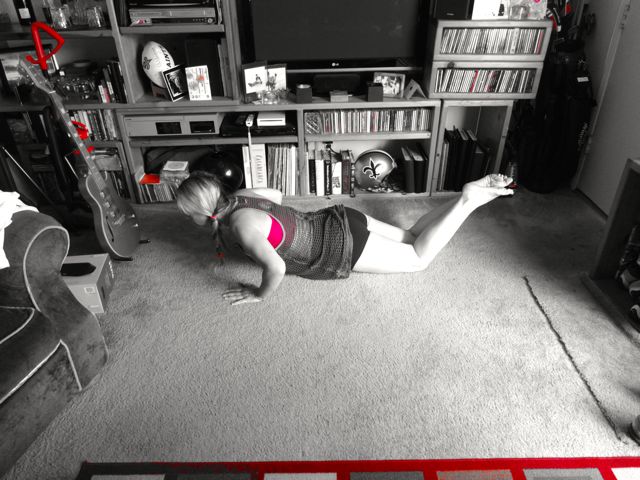
FULLY EXTENDED:
In the fully extended version below, I took my feet to shoulder width apart to make the push up slightly easier.
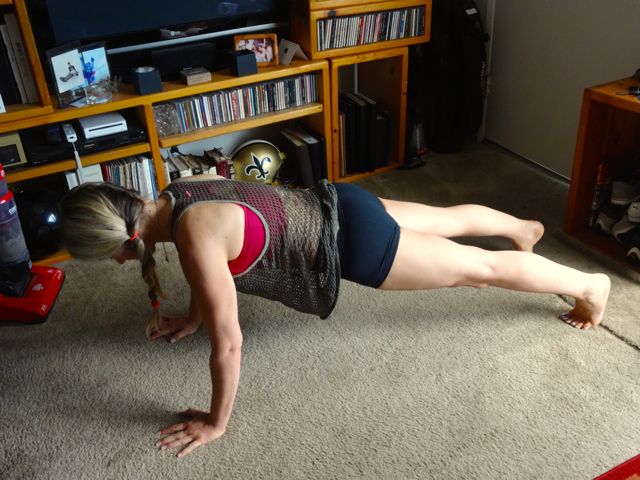
Push ups are the next step after a plank hold and will further engage the shoulder muscles (deltoids), triceps, biceps, lateral and chest muscles
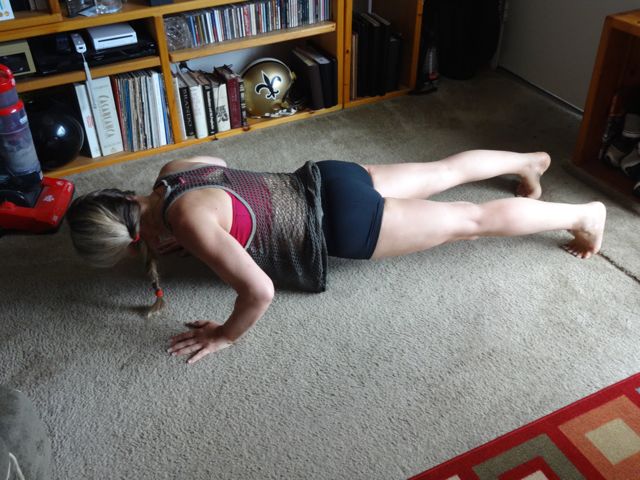
ON THE KNEES:
Starting in the same beginning plank hold as before, you gently lower all the way down, taking your chest as close to the floor as possible, and press yourself back up to that plank hold.
THINGS TO NOTE ABOUT PUSH UPS:
1) Choose a posture, either kneeling or fully extended out onto the feet.
2) Watch your arm position in traditional push ups. The hands are a few inches to the outside of the shoulders so that when you come down, your elbows bow out slightly and your shoulders, if touching the ground would be right next to or on top of the thumbs.
3) Continue to engage your abs throughout the entire exercise, preventing your pelvis from either sagging too low or lifting up too high.
4) Maintain a strong plank (solid board) stance throughout each rotation up and down.
5) Separate the feet a bit to make it a little easier, and bring the feet together if you are ready for a challenge!
6) Keep every muscle engaged, solid and strong throughout the exercise.
7) CHALLENGE 1: Lift one leg up for half of your push ups, then switch feet for the other half.
8) CHALLENGE 2: Cross your feet when in fully extended push up stance, and switch it up half way through!
DO AT YOUR OWN RISK: This post is for informational purposes only. Consult a physician before performing this or any exercise program. It is your responsibility to evaluate your own medical and physical condition, or that of your clients, and to independently determine whether to perform, use or adapt any of the information or content in this video/photo series. Any exercise program may result in injury. By voluntarily undertaking any exercise displayed on this website, you assume the risk of any resulting injury. Read full disclaimer here.